

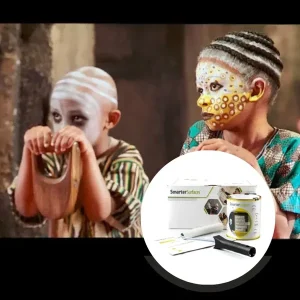
Clear Projector Screen Paint
From $302.00
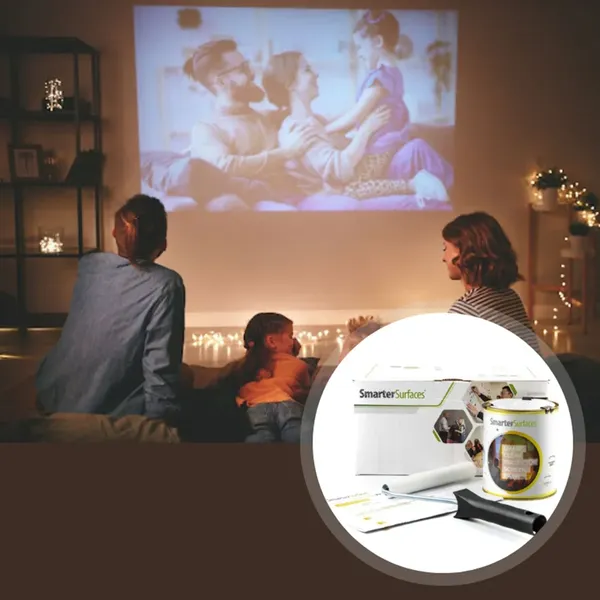
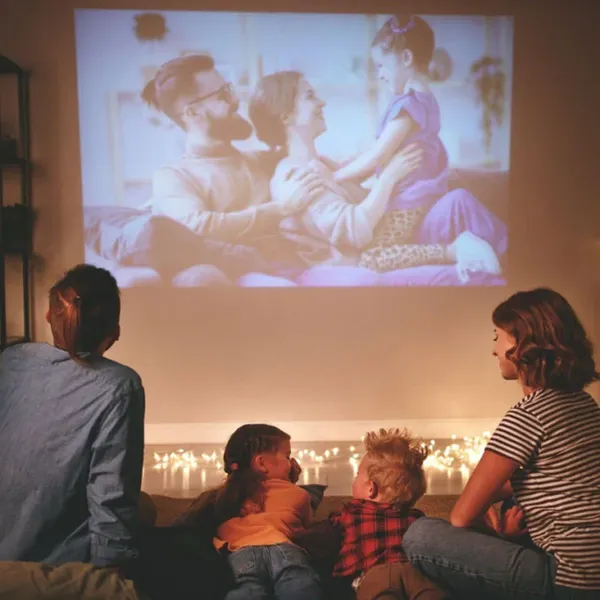
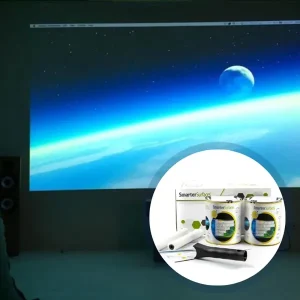
Clear projector screen paint is an easy-to-apply transparent paint to create a multi-use room that enhances the projection performance of normal surfaces, such as painted walls.
5-Year Guarantee
4K & 8K Ultra HD ready
Eliminates Hotspots
Ready-to-use in 24 hours
- Suitable surface: fabrics, wallboards, metal, concrete, & wood
- Designed for movie and gaming projection
- Requires projectors with adjustable colour correction
- Independent Projection Performance Report – CREST
Secured Transaction

Easy Returns
Free Shipping above $109.00
Buy now, pay later with Stripe
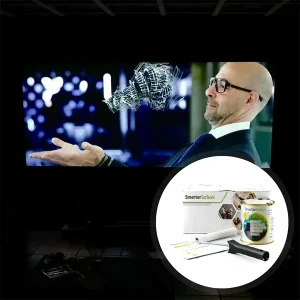
Why Choose Clear Projector Screen Paint
It turns any smooth surface into a high-performance projection screen and preserves the original wall colour and design aesthetic.

High Performance Coating
Delivers superior image clarity and uniformity on a suitable surface.

Improved Projection Performance
Reduces light interference, enhances colour, and light reflectivity uniformity

Easy Application Process
Apply two-coat paint on top of your desired colour paint

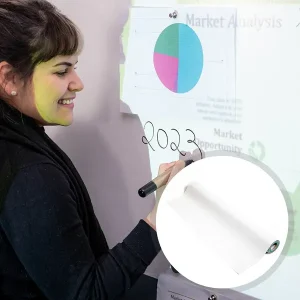
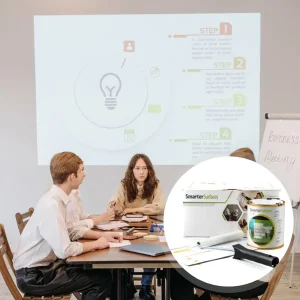
Suitable for Any Application
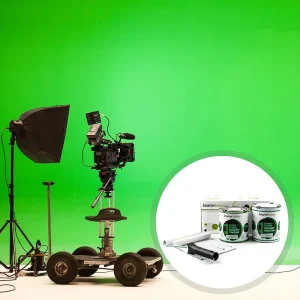
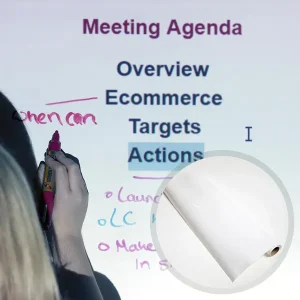
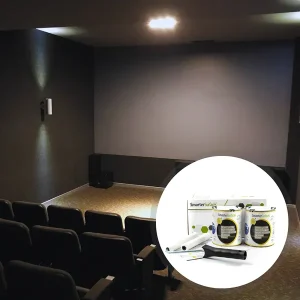
Perfect for home theatres, gaming screens, meeting rooms, and classrooms

Maintains Room Design
Transforms a previously painted wall into a projector screen
Technical Specifications
Screen Size (Volume)/ Coverage:
4.5 m² (880ml): 279cm x 157cm at 16:9 Aspect Ratio
25 m² (5l): 667cm x 375cm at 16:9 Aspect Ratio
Product Colour
Transparent
Product Finish
Matt
VOC
Less than 0.33%
Magnetic Content
75% plus magnetite
Odour
Very low
Performance
4K & 8K Ultra HD Ready
Gain Value @ 90°: 1.03
Viewing Angle: 140 degrees
What To Use With Transparent Projection Screen
Projector Requirements: Interactive, HD, 4K, Standard Projectors with adjustable colour tone (Colour mode setting)
Leading Projectors: Epson, BenQ, Sony, Panasonic, LG, and Optoma Projectors
Minimum Recommended Lumen Value: 1,200 Lumens
Lighting: Brighter rooms with normal to high-level ambient light

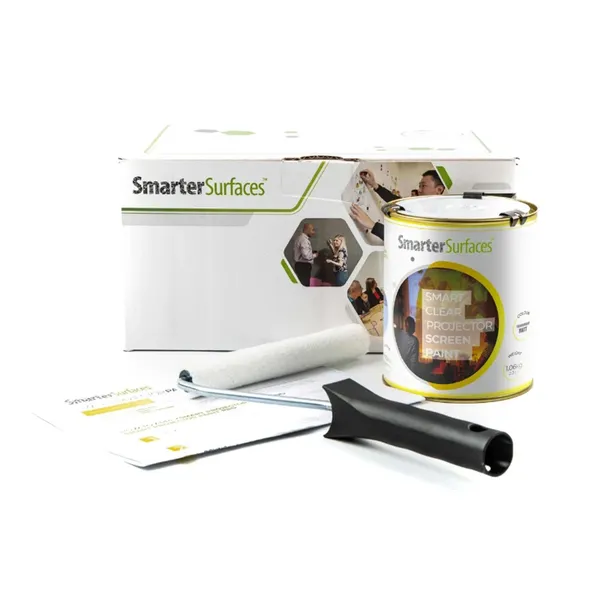
Kit Contents 4.5 m²
- Transparent Projector Screen Paint
- Roller Handle
- Roller Sleeve
- Stirring Stick
- Application Guide
Kit Contents 25 m²
- Transparent Projector Screen Paint
- Application Guide

Environmental
(exceeds all Australian standards):Low VOC, solvent-free, PFOA & PFOS-free, and isocyanate-free.
Certification
CREST, Gypsum Surface Finish Quality Standard of EU Level Q4

We work with a network of global courier services to offer you the best shipping options available. If you place your order before 12.30pm GMT on Monday to Friday, our warehouse will process your order the same day. Orders placed after 12.30pm GMT, will be processed on the next working day. Orders made on Saturday and Sunday are processed on Monday morning.
Estimated Delivery (Working Days):
AUS:
- Express: 2-3 days
- Free Shipping above $179: 5-6 days
For other locations, delivery times may vary. Click here
Use Cases

Commercial
- Corporate offices
- Rooftop venues
- Showrooms
- Lounges areas

Education
- Classrooms
- Lecture halls
- Auditoriums
- Libraries and galleries

Home
- Home theatres
- Living room
- Basements areas
- Garages & Gaming Room

Entertainment
- Cinemas and movie theatres
- Gaming lounges and arcades
- Sports bars and restaurants
- Event spaces
Not sure if Transparent Projector Screen Paint is right for you?
Need help choosing the right product?
Clear Projector Screen Paint works best for movies and gaming in controlled lighting. Our Smarter Surfaces experts can verify your projector's colour correction capability and recommend the perfect setup.
How to Apply Clear Projector Screen Paint
A simple application process designed for fixed indoor projection surfaces.

1. Surface Prep
Clean, dry, and sand the area. Fill any imperfections for a smooth finish.

2. Define Area
Paint the entire wall for best results, or mark a specific section with masking tape.

3. Apply Paint
Stir well. Apply two coats, waiting 2-4 hours between coats at 20°C.

4. Drying Time
The paint will be touch-dry in under one hour and ready for projection after 24 hours.
Watch Our Step-by-Step Video Application Guide
Suitable Surfaces
Transform any smooth surfaces into collaborative spaces
Wall Surface
Wood & Composite Panels
Interior Wall
Board Materials
See the Transformation
View real before-and-after examples of large transparent projection solutions in use.
")

Customer Testimonials
Real experiences from customers who've transformed their spaces with our projector screen paints
Explore More Products From Smarter Surfaces
Case Studies
See how our products deliver cinema-quality results in homes and businesses worldwide.

EPIC Museum: Transforming Heritage with Projection Mapping

Use Projector Wallpaper Not Screens

SAP Transforms Walls Into Creative Spaces
FAQ's
General Product Questions
What kind of projectors are compatible with Projector Paints?
Clear Projector Screen Paint is best suited for projectors with colour calibration features, as it is designed to be applied over a pre-painted colour.
How does transparent projector screen paint work?
Our transparent projector paint is a special type of paint designed for creating projection surfaces. It contains reflective particles in a transparent base. When applied evenly to a surface, it reflects projected light, creating a projectable surface in your base colour. This is a cost-effective alternative to traditional screens, but you will need a projector with colour mode settings to adjust for the colour of the wall.
Application & Usage
What projector settings work best when using Clear Projector Screen Paint?
A projector with colour mode settings are essential for Smart Clear Projector Screen Paint because they allow users to optimise the projection performance on walls painted in colour.
Does Clear Projector Screen Paint Work with Both 2D and 3D Projectors?
Yes, our entire range of paints is fully compatible with both 2D and 3D projectors, ensuring optimal performance in either mode. When used with a 3D projector, our paint accurately delivers the intended effect, providing an immersive viewing experience when paired with 3D glasses.
Surface Prep & Priming
What are the various surfaces Clear Projector Screen Paint can be applied to?
Clear Projector Screen Paint can be applied on a wide array of surfaces, such as wallboards, metal, concrete, wood, and fabric. It is not recommended for roll-up screens. However, the surface must be smooth. Also, the paint is for interior use only.
Is it essential to prime the surface prior to applying the Clear Projection Screen Paint?
No, the painted coloured wall serves as the primer. So do not apply any additional primer over it. Ensure the colour is solid, but if you're unsure about the quality, then apply an extra coat of coloured paint to the wall.
Cleaning & Maintenance
How do I remove the paint stains from my skin?
If you get paint on your skin, then simply wash it off with warm, soapy water.
What should I do in case of an accidental paint spill?
Well, just clean up spills and tools with water before the paint dries.
How do I clean my clear paint screen?
Maintaining your screen is a breeze. All you need to do is wipe it down with a dry or slightly damp cloth to keep it looking fresh and clear.
Functionality & Performance
What is gain value, and how does it affect my projector screen choice?
Gain value measures a screen's ability to reflect light compared to a standard matte white surface (gain 1.0) and affects the brightness of the projected image. Higher gain screens (>1.0) produce brighter images and work well in well-lit spaces, but offer narrower viewing angles, making them less suitable for large audiences or outdoor use. Lower gain screens (<1.0) provide wider viewing angles and even light distribution, ideal for controlled indoor environments and larger groups, but may appear dimmer and lack contrast.
The ideal gain depends on your lighting conditions, room size, audience positioning, and whether you prioritize brightness or viewing angle flexibility—standard 1.0 gain offers the best balance for most setups.
What is the gain value of Smarter Surfaces transparent projection screen paint?
Clear Projector Screen Paint has a gain of 1.03 at 90°.
Does the Clear Projector Screen Paint work with blended projections?
Yes, Smarter Surfaces large transparent projection solutions paint is specifically designed to support blended projections, making it an excellent choice for immersive visual experiences in art installations, theatres, and large-scale presentations.
This paint transforms any space into a high-performance projection surface, ensuring a professional and cohesive display.
Why Are Our Projection Paints Acoustically Transparent?
Our Projection Paints are acoustically transparent, meaning they don't interfere with sound quality. We tested the Sound Absorption Coefficient (SAC) on 12mm gypsum board, measuring how much sound energy the material absorbs.
Both unpainted and painted boards showed identical SAC values (α = 0.04-0.07 across different frequencies). This confirms that our transparent projection screen paint maintains the original acoustic properties of the surface. This ensures your audio system performs optimally without any sound distortion or absorption caused by the paint layer.
How Is Clear Projector Screen Paint ‘Polarity Preserving’?
3D projectors function by projecting two slightly different overlapping images onto the screen. These images then pass through optical filters, polarizing the light differently for each projection. When viewed through 3D glasses, each lens blocks one of the images, thereby allowing the left eye to see one image and the right eye to see the other.
Our paint products are "polarity preserving," ensuring that the projected images retain their intended polarization. This guarantees that the full 3D effect is maintained without distortion, delivering an authentic viewing experience.
Safety & Environmental
Is Clear Projector Screen Paint Safe?
Yes. Our Clear Projector Screen Paint is completely safe to use. It boasts a low VOC formula, is free from solvents, PFOA, PFOS, and isocyanates. So you can paint with confidence.
Does Clear Projector Screen Paint Meet Safety Standards?
Yes, our transparent projector screen paint meets top-tier environmental standards and has been independently certified for fire performance and VOC emissions. However, we always recommend wearing the gloves provided in the kit while applying the paint. After all, this is a regular practice with any painting project.
Is Clear Projector Screen Paint Isocyanate-Free?
It’s always good practice to use the gloves included in the kit when applying Clear Projector Screen Paint. We also suggest wearing safety glasses and ensuring the room is well-ventilated for a smooth and safe application process.
What protective gear should I use while painting?
Yes, it is appropriate for kitchen use as well, as it is water-based, low in VOCs, and free from solvents, PFOA, and PFOS.
Is Clear Projector Screen Paint Flammable?
No, this transparent projection screen paint is certified for fire performance, thus making it a trusted choice for schools, offices, and commercial spaces. With a high flashpoint of over 158°F, you can be rest assured and work with peace of mind.
Can Clear Projector Screen Paint be used around people?
Yes. This paint is low VOC and low odour, thus making it perfectly safe to use around both adults and children. Plus, with no isocyanates in the mix, you can be rest assured that it’s a safe and reliable choice for any environment.
Featured Blogs
Learn how ultra magnetic chalkboard paint compares to standard magnetic and chalkboard wall solutions.


