by administrator | Sep 10, 2018 | Blog

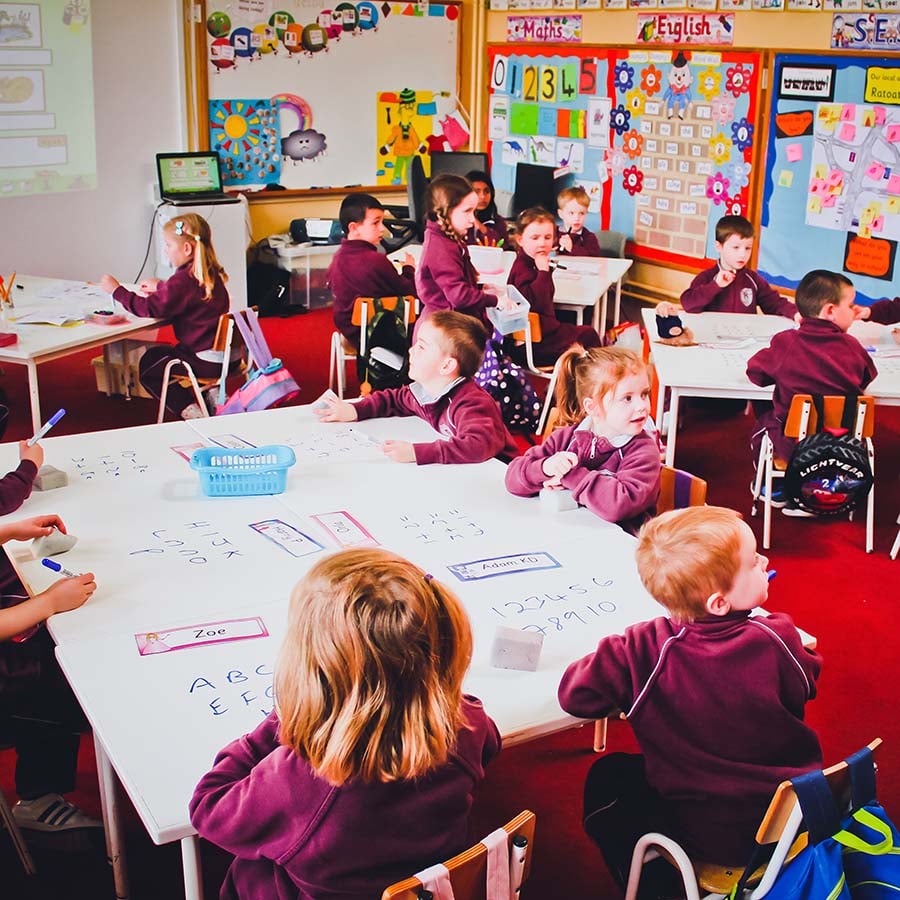
A writable desk is the smartest furniture you can offer students and teachers. It just makes huddling up and brainstorming so much more fun. There is zero wastage of paper, an unbridled flow of thoughts, and enough space for two or three people to write simultaneously – adding wings to ideas.
However, replacing all of your classroom desks with writable desks is a costly undertaking. It’s almost inconceivable unless you are working with a huge budget. The logistics are just too much, and upgrading an entire school with writable desks will take forever. That’s where Smarter Surfaces comes in with the self-adhesive whiteboard films.
Creating writable desks with whiteboard films
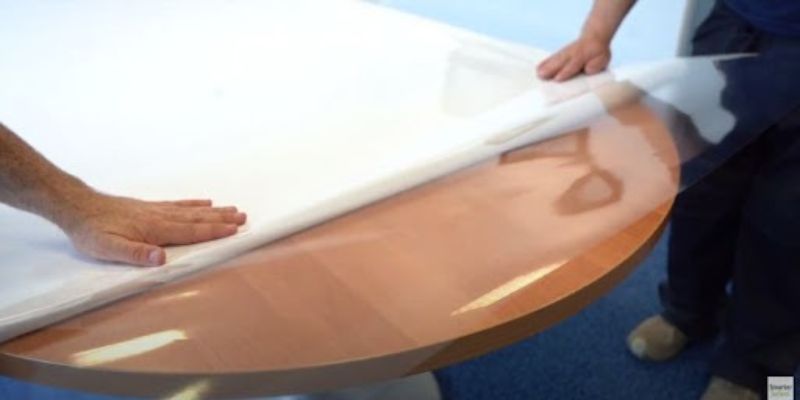
You don’t need to replace the existing desks, you just need to add a writable layer to them. The whiteboard films by Smarter Surfaces are the best products for the job. Just stick the self-adhesive film onto the desktop and voila! You get a writable desk. The film is able to turn any smooth, non-absorbent surface into a dry-erase writing area. It can be used on glass doors, metal panels, old whiteboards, and virtually any surface but a wall made of concrete or wood. You can write on it with dry-erase markers and clean it with microfibre cloths.
Exploring the options with whiteboard films
Once you decide to transform regular classroom desktops into writable surfaces, there are quite a few options to explore.
White whiteboard film
You can use the white whiteboard film to create writable desks with a glossy white finish. The same product can be used to restore old whiteboards or upgrade old chalkboards.
Clear whiteboard film
Then comes the clear self-adhesive whiteboard film. It offers the same functionality as the white whiteboard film but with a transparent finish. This product creates a writable surface without changing the colour of the original surface – just adds a layer of specialist resin-infused clear paint on top of it. This product is very popular among office designers for its aesthetic appeal, nevertheless, there’s no reason why schools can’t adopt it.
Low-sheen whiteboard film
With a gain value of 1.1 and a gloss measurement of 41GU, the projectable low-sheen whiteboard film is a solution for schools trying to make the learning environment more interesting. For instance, if you use this self-adhesive film on a large table and project on it from above, it can be a perfect interactive aid for lessons. One can project a map on the table during a geography lesson, or maybe project the intersection of a cell wall and then add pointers on the same surface with a dry-erase marker. It opens up a wonderful world of possibilities for educators. The combination of the projectability factor and the dry-erase quality makes this a one-of-a-kind product.
How to maintain a writable desk?
You can maintain a writable desk just as you would take care of a regular whiteboard.
- Do not use a permanent marker to write on it. If someone accidentally does use a permanent marker on the writable surface, you should use a high-quality permanent marker remover to clean it. You can use the same product for the occasional cleaning of stains or ink residue.
- Use a dry-erase cleaner to clean the writable surfaces after every few sessions of use. It will enhance performance, keep stains away, and add years to your writable desks’ life.
- Use good-quality dry-erase markers for best performance.
Qualities to look for in whiteboard films
You want whiteboard films that are easy to apply, long-lasting, and environmentally friendly. Smarter Surfaces ticks all the boxes.
- The self-adhesive whiteboard films by Smarter Surfaces come with a 5-year performance guarantee.
- The products exceed the standards of quality and safety across continents.
- The films have a Class A fire certificate further attesting to their safety.
- They are self-adhesive. So, all you need to do is remove the backing and stick it to the surface.
Smarter Surfaces gives you a detailed application guide and video-based installation tutorials to help you with the DIY process.
Our experts are ready to help you find the best product and install it. Book a free video consultation now.
We extend a bunch of special facilities including credit payment, free shipping, and personalised support for educational institutes. You can take advantage of these benefits by joining your educator programme.
by administrator | Sep 3, 2018 | Blog

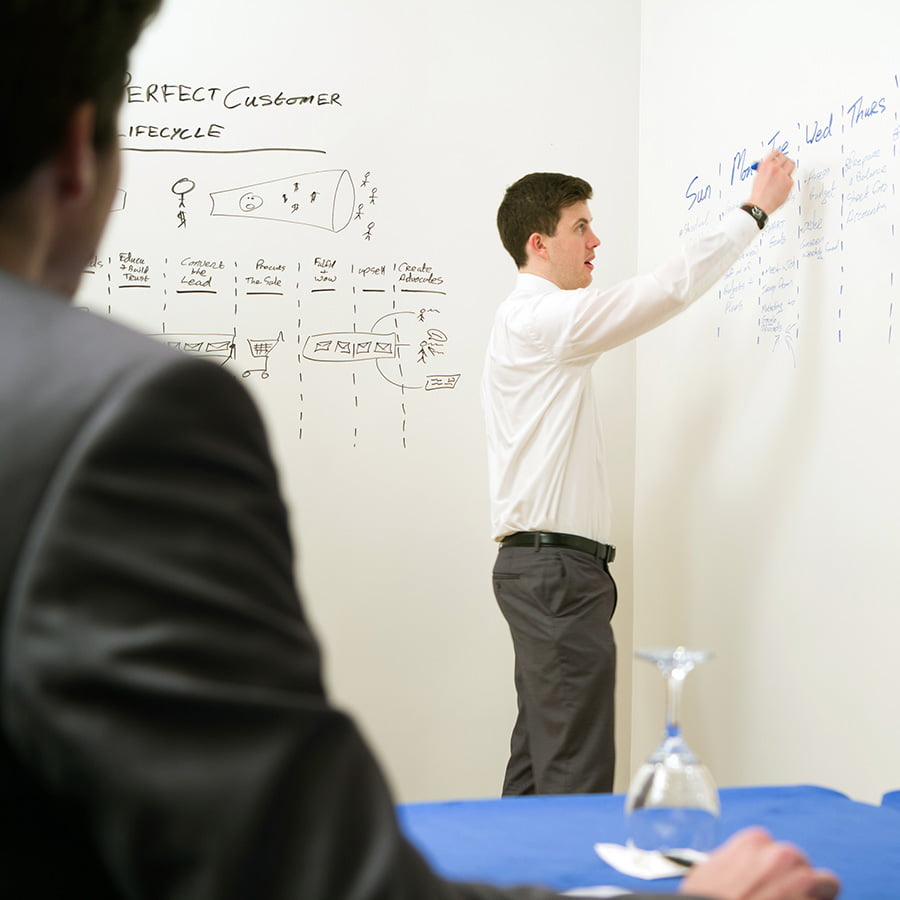
Traditional whiteboards come with limitations in terms of size, the kind of space it requires, and in terms of functionality. Writable walls can circumnavigate these limitations (quite literally) and add a fresh dynamic to an office space.
With writable walls, you can bid farewell to the fear of running out of board space while expressing ideas. You can invite collaboration and enhance the free flow of creativity in offices, schools, and even at home. The best part is that you can create writable walls out of regular walls by yourself.
Two different ways of creating writable walls
There are two ways of creating a writable wall.
With either of the above methods, you can turn a regular wall into a dry-erase writable surface. You can use dry-erase markers to write on them and clean them up with microfibre cloths.
Depending on the surface, one method of creating a writable wall may be more suitable than the other. For instance, it is easier to apply the whiteboard paint on unusual surfaces that have obstructions like a switchboard, a pillar, a window or any other fixture. On the other side, if you have a large, plain wall, it is easier and faster to apply the whiteboard wallpaper.
If you are unsure what product to choose for your writable walls, get in touch with our product advisors. They will take a look at your wall and suggest the best product and application method for you.
A step-by-step guide to creating a writable wall with whiteboard paint
Step 1: Prepare the wall
Look for inconsistencies, holes, or bumps on the surface. Use a regular decorator’s filler to fill up any holes or cracks. Use sandpaper to get rid of inconsistencies or debris
Step 2: Prime the wall
Use two coats of high-quality primer to prime the wall. Wait for 2-4 hours in between the coats for the primer to dry. Priming the wall is not necessary if your wall is freshly painted.
Step 3: Prepare the whiteboard paint
The smart whiteboard paint comes in two parts – part A and part B. Pour all of part A into part B and stir it well for at least 5 minutes.
Step 4: Applying the whiteboard paint
Start applying the whiteboard paint to small sections with a roller. Make sure that you soak the roller evenly but not so much that the paint drips from it or hinders the rolling motion. Roll the paint vertically with even pressure.
The detailed application guide and installation videos will help you along the way.
Once you are done with a section, check it from different angles to ensure no inconsistencies.
The paint will be touch dry in 4 hours but you should wait 4 days for the paint to cure properly.
A step-by-step guide to applying whiteboard wallpaper
The application process for the whiteboard wallpaper has only three steps.
- Stir the vinyl-over-vinyl wallpaper adhesive to reach a smooth consistency, you can add up to 10% water if needed.
- Ensure you have a smooth surface and apply two coats of adhesive with a roller.
- Apply the wallpaper following the instructions in our wallpaper installation guide.
It is normal for air bubbles to form underneath the wallpaper while installing. Use a plastic spatula to push the excess adhesive towards the edges. You can use a damp cloth to clean any adhesive residue. Your writable wall will be ready and fully functional within 24 hours.
Making your writable walls more interesting
You can have a magnetic whiteboard wall using one of two methods:
- Apply 4 coats of magnetic paint before applying the primer and then apply the whiteboard paint.
Or
- Use the magnetic whiteboard wallpaper instead of the regular whiteboard wallpaper.
You can have a writable wall that doubles as a projector screen by using the matt whiteboard paint or by applying the low-sheen whiteboard wallpaper.
Smarter Surfaces also offers a magnetic projector screen whiteboard wallpaper that ties three functionalities into one product. This wallpaper gives you a writable wall that you can stick magnets to and project on with short-throw or long-throw projectors.
Creating writable walls in the colour of your choice
If you have a freshly painted wall that you want to turn into a whiteboard without changing its colour, Smarter Surfaces has the perfect product for you. All you need to do is apply a coat of clear whiteboard paint and the surface will be ready to use as a whiteboard within 4 days.
In fact, you can turn a wooden wall into a writable wall by adding an extra step.
First, apply two coats of clear primer on the wooden surface to close up its pores. Then, apply the clear whiteboard paint to get a writable wall without losing the natural finish.
The dry-erase self-adhesive films are perfect for turning wooden tabletops, glass doors, or metal panels into writable surfaces.
4 key benefits of having a writable wall
- It turns a boring office wall into a centre for communication and collaboration.
- In a classroom, students will never run out of space while expressing their ideas.
- It’s a great space for recreational activities like quizzes and games.
- With the added qualities of magnetic receptibility and projectability, the writable walls become hubs of innovation and convenient communication.
If you are having trouble deciding what product you should use for your specific needs, it’s quite normal. That is why the experts at Smarter Surfaces are always available to offer you insights and help you find the right fit. You can get personalised advice from our product advisors and industry experts, and we won’t charge you for that. Book a video consultation now.
by administrator | Aug 19, 2018 | Blog
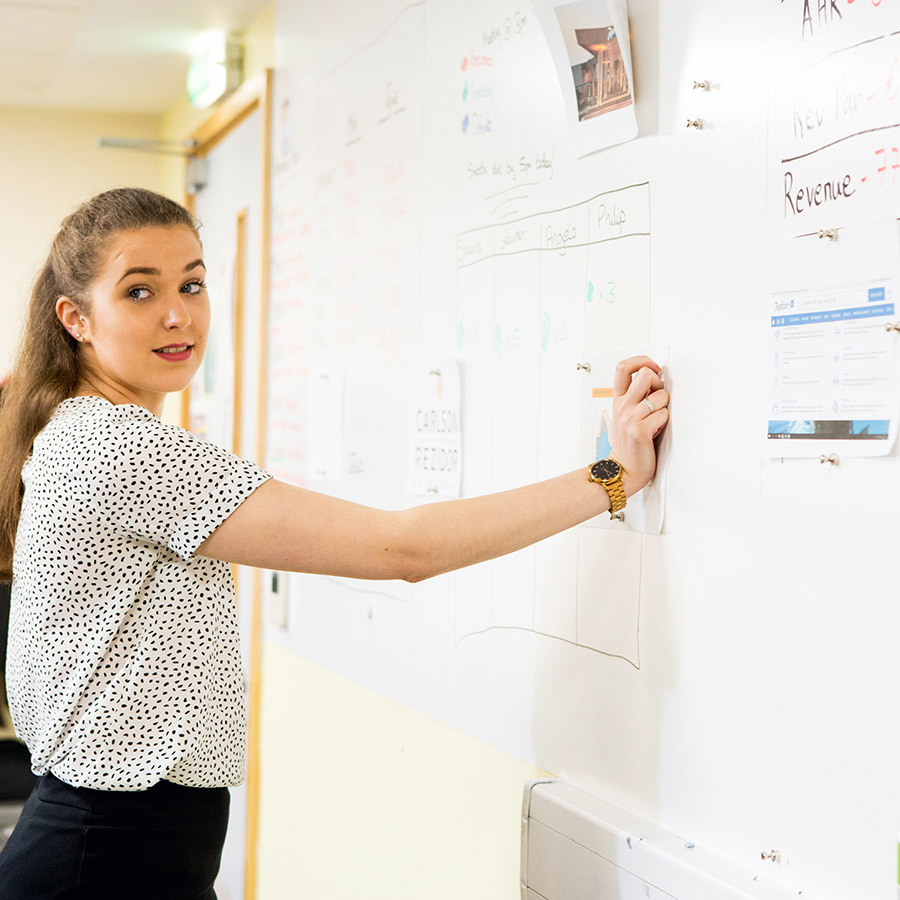
You can realise the value of writable surfaces around the office only after you’ve had them for some time. They add a fresh dynamic to the workspace. Every wall in the office has the potential to become a fountain of ideas. Smarter Surfaces specialises in converting regular walls, furniture, and virtually any smooth surface into a supercharged collaborative haven with nanoengineered dry-erase paints, multi-functional wallpapers, and magnetic paints and plasters.
In this post, we’ll discuss how you can create smart writable surfaces around your office and how the endeavour can tap into the innovative and collaborative potential of your workforce.
5 writable surfaces we’ll explore
- A whiteboard wall in white
- A whiteboard wall in your brand colours
- Magnetic whiteboard walls in white and in any colour
- Projection screen magnetic whiteboard walls
- Writable desks, doors, and other surfaces
A whiteboard wall in white
A whiteboard wall with a white finish is the closest alternative to a traditional whiteboard but it’s better. The white writable wall is suitable for meeting rooms, conference halls, etc. It opens up possibilities like using the same wall as a whiteboard and a projection screen.
There are two methods of creating a whiteboard wall in white.
- You can apply whiteboard paint to the wall
- You can install a whiteboard wallpaper.
Either way, you end up with a large whiteboard wall that you can write on with dry-erase markers. The nature of the wall may suit one method more than the other. For instance, if your wall has permanent fixtures like electrical panels or switchboards, whiteboard paint is more suitable as you can tape off the fixtures and paint around them. On the other hand, the wallpaper is easier to install and becomes ready faster.
A whiteboard wall in your brand colours
You can have a whiteboard wall in any colour. It can be a great opportunity to deck up your office with functional yet aesthetically pleasing walls that are consistent with your brand. The product you need for this is clear whiteboard paint.
Clear whiteboard paint can be applied to a painted wall directly provided that the paint is not worn out and the wall is smooth. In the case of a wooden wall, you’d need to first apply a couple of coats of clear primer to treat the porous surface.
Magnetic whiteboard wall
Adding magnetic properties to an office wall creates some interesting opportunities. You can stick notes to it, keep important information handy, and get rid of unreliable thumbtacks. A magnetic whiteboard surface lets you write and stick information with magnets at the same time.
You can create a magnetic whiteboard wall using paint or by installing wallpapers.
Smarter Surfaces’ magnetic paint and super magnetic paint are perfect for the job. These paints are infused with magnetite – a mineral ore with ferrimagnetic properties. 4-6 coats of the magnetic paint enables a regular wall to hold 4 to 5 sheets of A4-size paper.
To create a white magnetic whiteboard, you need to cover the magnetic wall with white water-based primer and then apply whiteboard paint in white.
You can apply any colour of your choice to the magnetic wall and then apply a coat of clear whiteboard paint to have a magnetic whiteboard wall in any colour.
Alternatively, you can cover a regular wall with a magnetic whiteboard wallpaper to get a magnetic whiteboard surface in white.
Projection screen magnetic whiteboard walls
With the right set of products, you can create multi-functional surfaces that work as whiteboards, magnetic boards, and projection screens.
The projection screen magnetic whiteboard wallpaper is designed for these specific purposes. This wallpaper gives you a three-in-one wall that can be the centrepiece of any meeting room.
You can achieve the same multi-functional wall using paint too. First, you need to create a magnetic wall using magnetic or super magnetic paint. Then, you prime it and let the primer dry. After that, you cover the wall with low-sheen whiteboard paint that can be used as a projection screen.
Writable desks, doors, and other surfaces
You can turn any smooth wooden or metallic surface into a whiteboard for writing, drawing, and collaborating using our self-adhesive films, available in white, clear, and projectable low sheen.
The films turn your furniture, doors, and metal panels into writable surfaces where you can write with a dry-erase marker. These films are easy to install and come with a 5-year performance guarantee. You can also use the self adhesive films to refurbish old, worn out whiteboards in the office.
Unusual Ways To Use Writable Surfaces
Writable surfaces offer a multitude of creative and practical uses beyond the traditional office or classroom spaces. Sports teams can enhance their pre-match planning and communication using Whiteboard Paint, while weddings can benefit from Chalkboard Paint for seating plans and directions. You can turn your office space with murals or simplify tasks like office lunch orders with writable walls. The possibilities are endless.
How to maintain writable surfaces
A writable surface created using our products can be used at peak performance for years. For that to happen, your paint or wallpaper needs to be applied correctly and maintained properly.
You can always refer to application guidelines and tutorial videos to ensure the perfect application of the products. As far as maintenance is concerned, you need to take care of three things.
- Use dry-erase markers and microfibre cloths for writing and wiping
- Use a dry-erase cleaner clean the surfaces periodically
- Use a permanent marker remover for occasional cleaning of stains.
The best way to learn what product you should choose for your specific needs is to book a free video consultation with the product experts at Smarter Surfaces. You can show us your wall or surface, tell us what you are looking for, and our experts will guide you to the best solution possible.