A Detailed Guide to Turning Any Surface into a Projection Surface
Table of Content
- Introduction
- Why Choose Projection Paints and Wallpapers Over Traditional Screens
- Creating Outdoor Projection Surfaces
- Projection Solutions for Low-Light Environments
- Interactive Projection Surfaces
- How to Apply Projector Screen Paint Step by Step
- Projector Paint vs Projector Screen Comparison
- Final Thoughts
- FAQs
Projection technology has advanced significantly over the last decade, allowing businesses, educators and these days transforming almost any smooth surface into a high-quality projection screen is possible. Whether it is a classroom whiteboard, an office wall, a door, a metal panel, an outdoor wall or even a floor, you can achieve an efficient, cost-effective projection solution with the right surface products.
The good news is that the projection range by Smarter Surfaces has been engineered to meet diverse use cases. From outdoor projection screen paint designed for open-air events, to white projection screen paint for training rooms and classrooms with bright light, or interactive projector wall paint for classrooms and offices, there is a solution for every application.
This detailed guide will explain the types of projection paints and wallpapers available, their technical specifications, and the conditions they are best suited for. You will also learn how to turn a wall into a projector screen, the best paint colour for projector screen walls, and practical details such as how to apply projector screen paint step by step.
Why Choose Projection Paints and Wallpapers Over Traditional Screens?
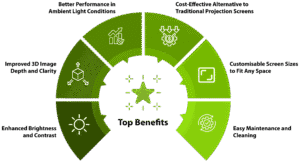
Traditional pull-down projector screens or standalone boards often come with limitations such as fixed dimensions, difficulty in integrating with interior design, and additional costs for installation and maintenance. In comparison, projection paints and wallpapers offer several benefits:
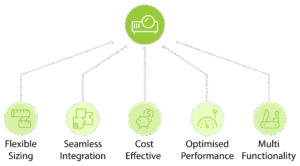
Flexible Sizing -
Create projection surfaces of any dimension, from compact boardroom walls to large projector walls for training rooms.
Seamless Integration -
Paint or wallpaper blends into the environment without bulky frames or equipment.
Cost-Effective -
Compared to mounted screens, projector paints offer long-term savings with low maintenance.
Optimised Performance -
Tailored gain values, colour tones, and finishes ensure suitability for 4K projection, low-light rooms, or bright classrooms.
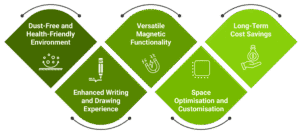
Multi-Functionality -
Certain products combine projection with whiteboard or magnetic functionality, delivering maximum value per wall.
By selecting the correct product, you can ensure that your projection surface is fit-for-purpose, durable, and delivers a professional-quality image.
Turning Classroom and Office Walls into Projection Surfaces
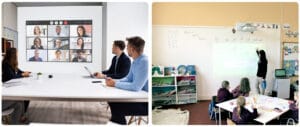
One of the most common questions we hear is: How to turn classroom and office walls into projection surfaces effectively?
Classrooms and meeting rooms often have high ambient light levels due to windows, overhead lighting, or open layouts. The main challenge is ensuring that projected images remain clear and vibrant without being washed out.
For these settings, Smarter Surfaces White Projector Screen Paint Pro is an excellent choice. This paint is engineered to deliver high brightness, with a gain value of 1.24 and a wide 140-degree viewing angle. It ensures that everyone in the room, whether seated at the back of a lecture hall or in the corner of a conference room, can see high-quality visuals.
It also supports HD and 4K projectors, making it ideal for professional presentations, training sessions, and collaborative environments. The paint’s low gloss level minimises hotspots and ensures uniform brightness across the surface.
This makes it one of the best projector paints for classrooms with bright light, providing both practicality and professional performance.
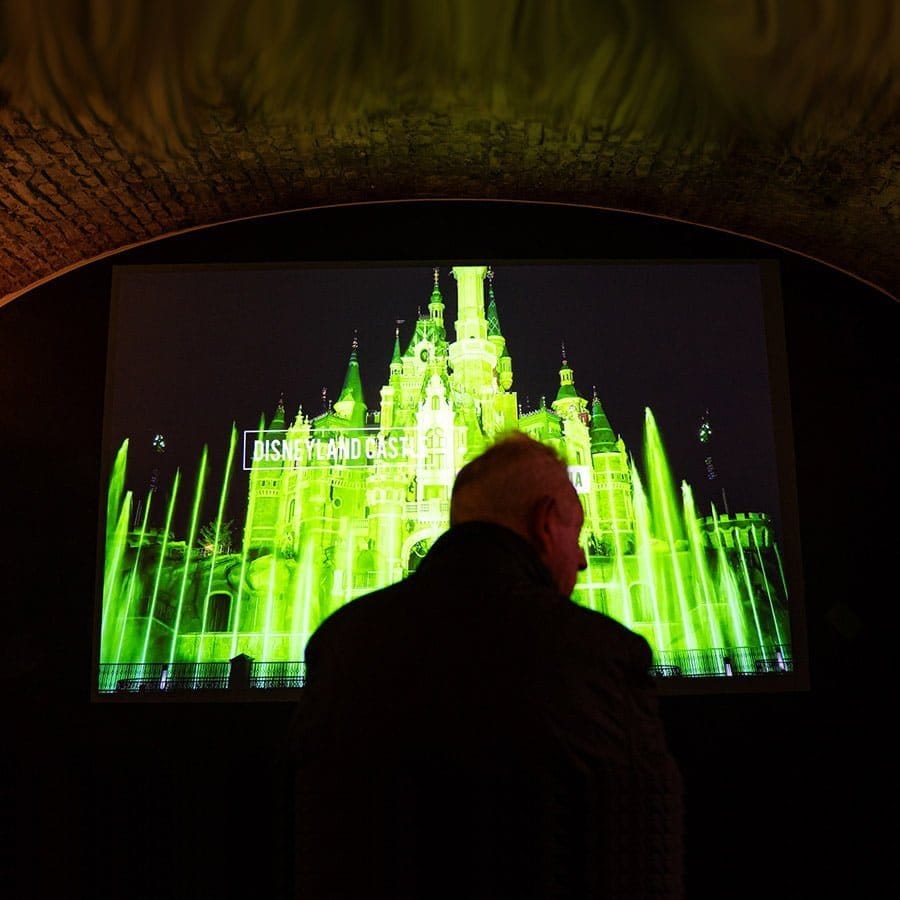
Creating Outdoor Projection Surfaces
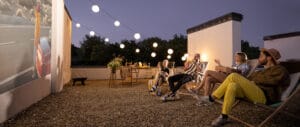
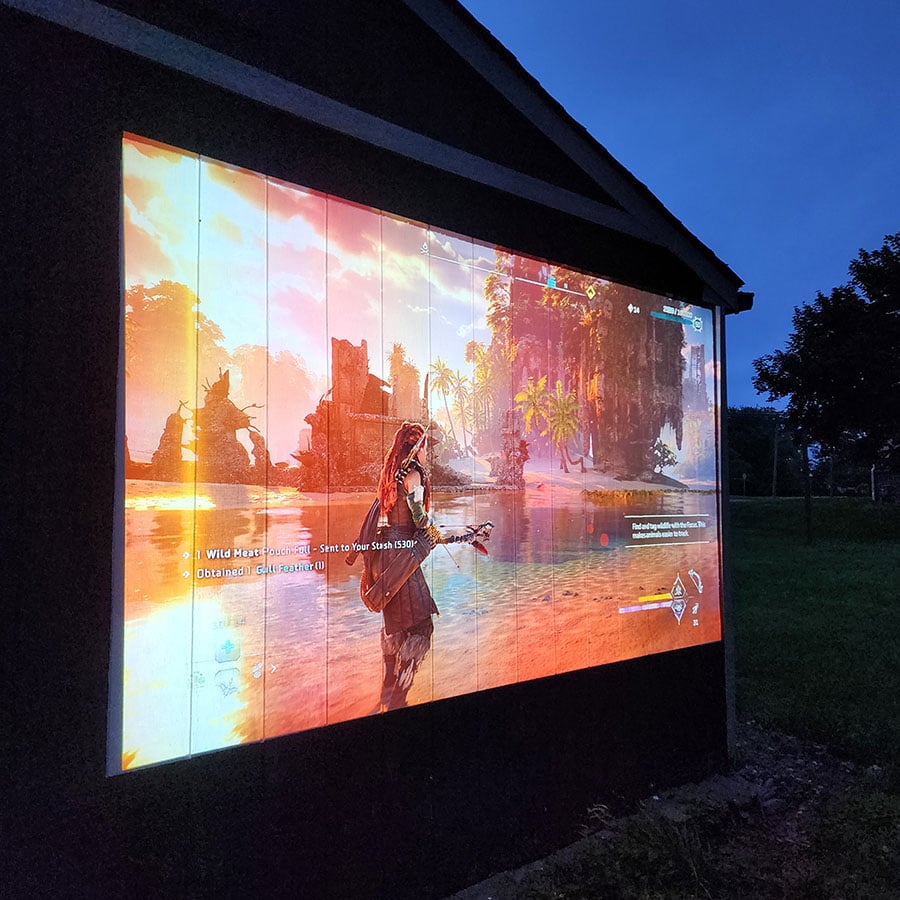
If you are considering how to create a backyard cinema or an outdoor display for events, the right paint can make all the difference. Unlike indoor environments, outdoor projection surfaces face challenges such as sunlight, weather conditions, and variable lighting.
Smarter Surfaces Outdoor Projector Screen Paint for backyard walls is designed. It has a gain value of 1.26 with a 140-degree viewing angle, providing clear visuals even in outdoor lighting conditions. While it works best outside of direct sunlight, it performs exceptionally well in shaded areas or during evening use.
This solution allows you to:
- Host outdoor movie nights with friends and family.
- Stream live sports events on a large wall.
- Deliver presentations or events in open-air venues.
Also, Smarter Surfaces offers Floor Projector Paint, which is unique in the industry. This product transforms floors into interactive projection areas that are durable, washable, and capable of handling foot traffic. It is particularly effective for trade shows, events, and interactive gaming experiences.
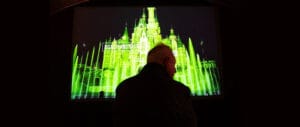
Projection Solutions for Low-Light Environments
In darkened rooms, using a standard high-gain white paint may result in images appearing too bright or lacking contrast. For these situations, darker projection paints are required, as they enhance contrast and deliver sharper image quality.
Options include:
- Ultra High-Contrast Projector Screen Paint - ideal for spaces requiring improved colour depth.
- Ambient Light Rejecting Projector Screen Paint - best suited for mixed-light environments where contrast is critical.
- High-Contrast Projector Screen Paint - balances brightness and contrast for multipurpose rooms.
- Black Projector Screen Paint - designed for designated dark rooms where maximum contrast is essential.
When evaluating the best paint colour for projector screen walls, dark greys and blacks deliver the highest colour contrast in low-light environments. For businesses or individuals wondering how much projector screen paint costs, the pricing will depend on coverage size, but it remains significantly more affordable than large-format projection screens.
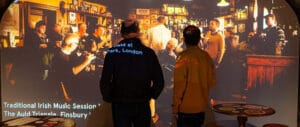
Interactive Projection Surfaces
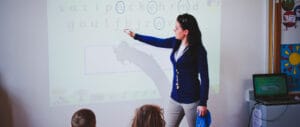
Beyond passive viewing, many professional and educational spaces require interactive projection walls. Smarter Surfaces offers specialised solutions for these requirements:
Touch-Resistant Projection Paint
The Interactive Projector Screen Paint provides durability against physical touch, fingerprints, and hand oils, making it suitable for interactive presentations, digital learning, or touch-enabled projection setups, think of an entire wall working just like a touch screen. Point your interactive projector at your wall and your good to go.
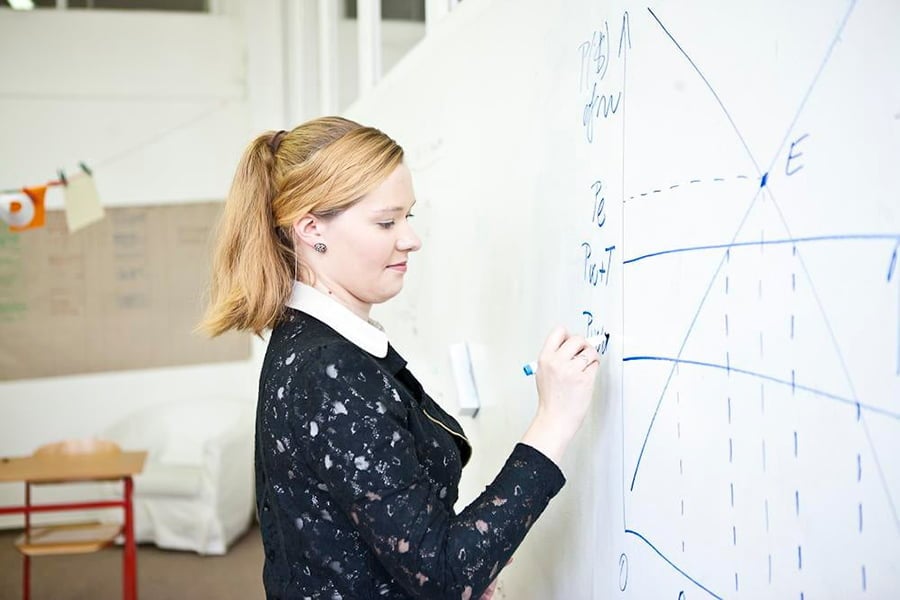
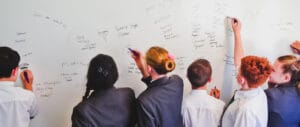
Projection and Writing Combined
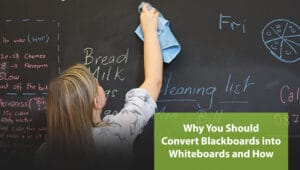
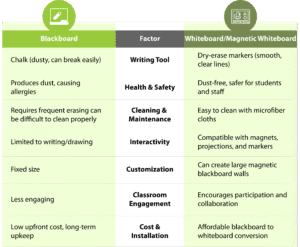
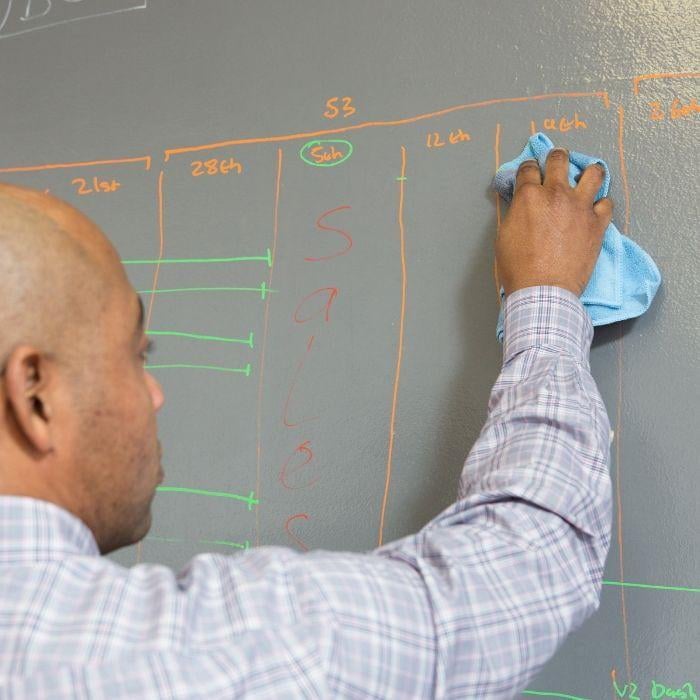
Another innovative option is low-sheen whiteboard wallpaper that functions both as a projector screen and a writable surface. In classrooms and meeting rooms, this allows for direct annotation during presentations.
For maximum functionality, the Magnetic Projector Screen Whiteboard Wallpaper combines projection, writing, and magnetic features, making it ideal for training rooms and boardrooms where versatility is required.
This is a practical response to queries such as Can you project on a whiteboard wall? While a regular glossy whiteboard may reflect too much light, these specialised wallpapers provide low sheen, ensuring projection clarity without sacrificing interactivity.
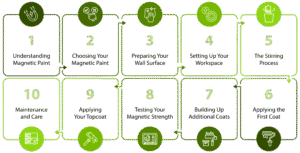
How to Apply Projector Screen Paint Step by Step
Application plays a critical role in the performance of projection surfaces. There is a standard method for most projector paints.
Clean the wall thoroughly, removing dust, grease, or old paint. For outdoor walls, a pressure wash may be required. Smooth uneven surfaces with filler or sanding. Apply a high-quality white primer. For exposed plaster, two coats may be necessary.
Stir the projector screen paint well to ensure an even consistency. Use a high-quality roller to apply the first coat. Allow drying (2-4 hours), then apply a second coat. Surfaces are typically ready for projection use within 12 hours.
This process solves the common user's query on how to apply projector screen paint step by step. Detailed product guides and video tutorials are provided with each purchase for customer assistance.
Projector Paint vs Projector Screen Comparison
When evaluating whether to use projector paint or a traditional projector screen, decision-makers should consider:
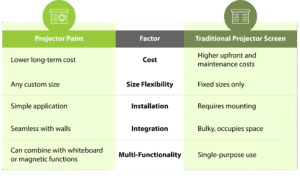
For classrooms, training rooms, and offices, projector paint offers greater value, efficiency, and flexibility compared to fixed projector screens.
Final Thoughts
Turning a wall, floor, or outdoor surface into a professional-quality projection screen is now simple with Smarter Surfaces range of projector paints and wallpapers. Whether your priority is clarity in bright classrooms, contrast in low-light spaces, or multi-functionality in offices and training rooms, there is a tailored solution available.
With flexible sizing, cost-effective installation, and seamless integration, projection screen paints and wallpapers are the modern alternative to traditional screens, ensuring businesses, schools, and individuals achieve the best results for presentations, entertainment, and collaboration.
FAQ's
How to turn a wall into a projector screen?
Prepare the surface, apply a primer, and then use a specialised projector screen paint. This creates a cost-effective, high-quality projection wall without bulky equipment
What is the best projector paint for classrooms with bright light?
The White Projector Screen Paint Pro is ideal due to its 1.24 gain and wide viewing angle, ensuring clarity in well-lit classrooms and training rooms.
Can you project on a whiteboard wall?
Not on standard glossy whiteboards, as they reflect too much light. Instead, use low-sheen projector whiteboard wallpapers designed for projection clarity
How much does projector screen paint cost?
Costs vary by coverage size, but it is significantly more affordable than traditional projection screens while offering greater flexibility
How to create a projector wall in an office?
Select the correct paint (typically white with high gain), prepare the wall, and apply it according to the instructions. This provides an efficient, space-saving projection solution