by administrator | Sep 14, 2020 | Blog

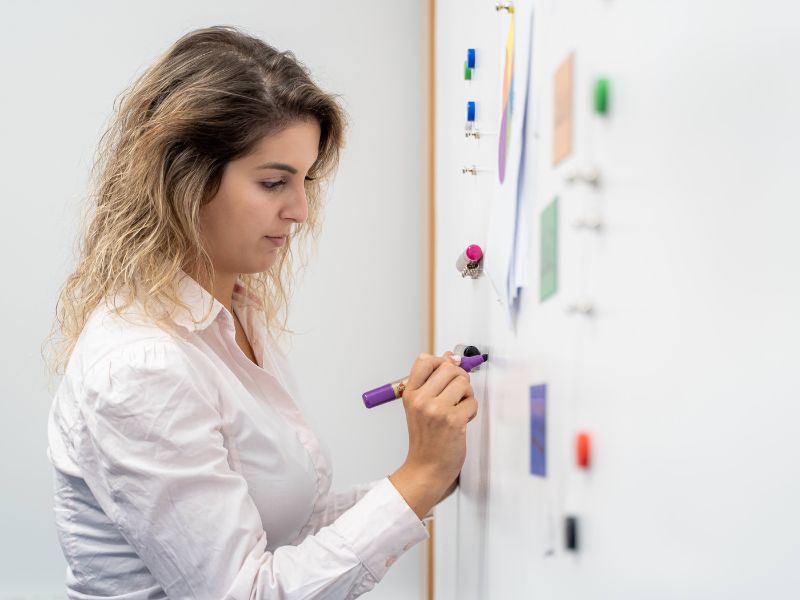
A whiteboard is a versatile tool for writing, drawing, and presenting information. Using whiteboard paint, you can turn entire walls into whiteboards enhancing the collaborative potential of classrooms and offices.
What is whiteboard paint?
Whiteboard paint is a specially designed paint that turns any smooth surface into a dry-erase, writable surface. You can apply it to walls, table tops, doors, and any other flat smooth surface. You can use walls painted with whiteboard paint for writing, and drawing with a dry-erase marker. You can wipe it clean with a microfibre cloth.
How to use whiteboard paint
Whiteboard paints have strong use cases in classrooms, offices, conference rooms, and even at home. Using whiteboard paint is very easy and you can apply it by yourself. In this post, we will discuss the application methods of whiteboard paint on different types of surfaces, and we will also talk about the best ways of maintaining the performance of a whiteboard over a long time.
Applying whiteboard paint on a wall?
You can apply smart whiteboard paint on a wall using a few simple steps
Prepare the wall
If you have a wall that was recently primed or painted, you can lightly sand it to get any minor inconsistency out.
For a wall with holes, cracks, or rough patches
- You can fill the holes and cracks with a decorator’s filler.
- Sand the surface to get a smooth finish
- Apply two coats of high-quality white primer and wait for it to dry out
- Sand lightly to ensure the wall is clean
Apply the paint
Smarter Surfaces’ whiteboard paint comes in two parts. Part A comes in small bottles and Part B comes in the tin.
Empty the bottles into the tin and stir it well for at least five minutes. At this point, your whiteboard paint is ready.
Select a small area of the wall and apply the paint with vertical strokes of the roller. Use a fresh roller for the whiteboard paint. Make sure the roller is evenly soaked in paint.
The application kit provided with the paint contains multiple roller sleeves, a roller handle, a pair of gloves, a stirring stick, and sandpaper. That means you get almost everything you need to apply the paint with the paint.
Let it dry
The wall becomes touch dry within 4 hours of applying the whiteboard paint. However, it takes up to 4 days for the dry-erase qualities to kick in. After that, you will have a high-quality dry-erase wall with a 10-year performance guarantee.
Maintaining a whiteboard wall
A whiteboard wall painted with Smarter Surfaces products will perform for years if you follow simple steps.
- Use a dry-erase cleaner to clean the board after every session of use so that there’s no ink residue build-up on the surface.
- Use microfibre cloths for erasing the dry-erase ink
- If you accidentally get permanent marker ink on the whiteboard wall, use permanent marker remover to clean that. Remember, this cleaner is very strong and meant only for occasional use.
Key benefits of using whiteboard paints
The difference between a traditional wall-mounted whiteboard and a whiteboard wall goes deeper than just the size of the writable area (which is surely a huge factor).
Top benefits of a writable wall in an office setting
- Creates a collaborative environment
- Meetings are more engaging with the visual cues
- Maximises the creative potential of the empty wall space
- Paint can be applied even on unusual walls, you don’t necessarily need an empty wall.
- It becomes a hub of fun activities and idea-sharing
The advantages of using whiteboard paint in classrooms
- You get the entire wall to put up information and leave it there for a few days if needed
- Inspires students to share their ideas freely
- Freedom from chalk dust and ensuing allergies
- Encourages active participation
How to create a whiteboard wall in a colour of your choice
You can have a dry-erase wall in any colour of your choice by using Smarter Surfaces’ clear whiteboard paint.
If your wall is freshly painted with a colour of your choice, you can simply apply a coat of clear whiteboard paint to it. It will create a transparent dry-erase layer on the wall. You will be able to write on it with dry-erase markers and wipe it clean with microfibre cloths.
This allows you to create whiteboard walls that complement your brand or match the colour of your school building. It’s also a great solution for creating clear whiteboard walls at home.
If you want to apply clear whiteboard paint on a wooden surface, make sure you apply a couple of coats of clear primer first.
How to create a magnetic whiteboard wall?
Smarter Surfaces has carefully curated product bundles to help you create magnetic whiteboard walls. You get magnetic paint, water-based white primer, and smart whiteboard paint in the bundle along with all the equipment necessary for the application of the paints.
The application process is quite straightforward.
Start by preparing the wall – fill holes, sand off inconsistencies, and create a smooth surface.
Apply 4 to 5 coats of the magnetic paint on the wall sanding the painted surface very lightly after each coat is touch dry.
Add at least two coats of white water-based primer once the magnetic paint is completely dry. Wait for at least 12 hours after applying the final coat of primer. Do not sand this layer. Your wall is now ready for the whiteboard paint and you already know how to apply the whiteboard paint on primer.
Things to keep in mind while buying whiteboard paint for walls
- The paint should be certified for fire safety with certified levels of VOC, isocyanates, PFOA and PFOS.
- You should receive a performance guarantee for the paint
- In the best-case scenario, the paints should come with application kits and guides
- It should be easy to apply.
Using whiteboard paint to refurbish old whiteboards and chalkboards
When it comes to refurbishing a chalkboard, you should start with a couple of coats of primer to prepare it for the whiteboard paint. Once the surface is smooth and dry, you can apply the paint to turn an old chalkboard into a brand-new whiteboard.
In the case of a whiteboard, you can simply apply the whiteboard paint or a self-adhesive whiteboard film. The self-adhesive film is the fastest solution for refurbishing old whiteboards or turning furniture like tables and desks into writable surfaces.
Do it yourself with Smarter Surfaces
Smarter Surfaces products are easy to apply and come with step-by-step guidelines and tutorial videos to make them DIY-friendly. That said, our product advisors are always just a click away. Get in touch if you have any questions.
You can also book a free video consultation. Show your space to our experts and they’ll help you find the best product for your needs and suggest you the best course of action.
by administrator | Oct 29, 2018 | Blog

Functional surfaces are a great addition to any learning environment. They promote interactive and collaborative learning, allowing students to visualise their lesson material better.
Just like in the classroom, functional surfaces can also benefit your school staffroom.
In this post, we’ll explore how a magnetic whiteboard can enhance the overall functionality of a classroom and staffy room setting.
What is a magnetic whiteboard?
A magnetic whiteboard is a writable surface that attracts magnets. So, apart from writing on it with dry-erase markers, you can stick papers, cards, photographs, etc. to it with good-quality magnets.
What are the best ways to get magnetic whiteboards?
Depending on where you want to have your magnetic whiteboards you can either use magnetic whiteboard paint or magnetic whiteboard wallpapers to create magnetic whiteboard surfaces in your school.
You can use magnetic whiteboard paint to create dry-erase magnetic walls, convert old chalkboards into magnetic whiteboard surfaces, and create writable magnetic walls in any colour. You can use magnetic plaster instead of magnetic paint to get a superior magnetic pull. The magnetite content in the paint gives ferrimagnetic properties to any surface.
The magnetic whiteboard wallpaper is also suitable for all the above purposes except creating transparent magnetic whiteboards.
What are the benefits of having a magnetic whiteboard in a staffroom?
There are a whole range of possibilities that open up with the installation of a supercharged collaborative tool such as a magnetic whiteboard. We’ll explore some of the possibilities here.
Better scheduling
With so many facilities and equipment, it can be hard to keep track of who is using the school gym or TV at any given time.
Instead of printing out a schedule of which staff member will be using which facility at a certain time, why not just write it up on your magnetic whiteboard wall?
This way if any changes need to be made to the schedule you can easily do so.
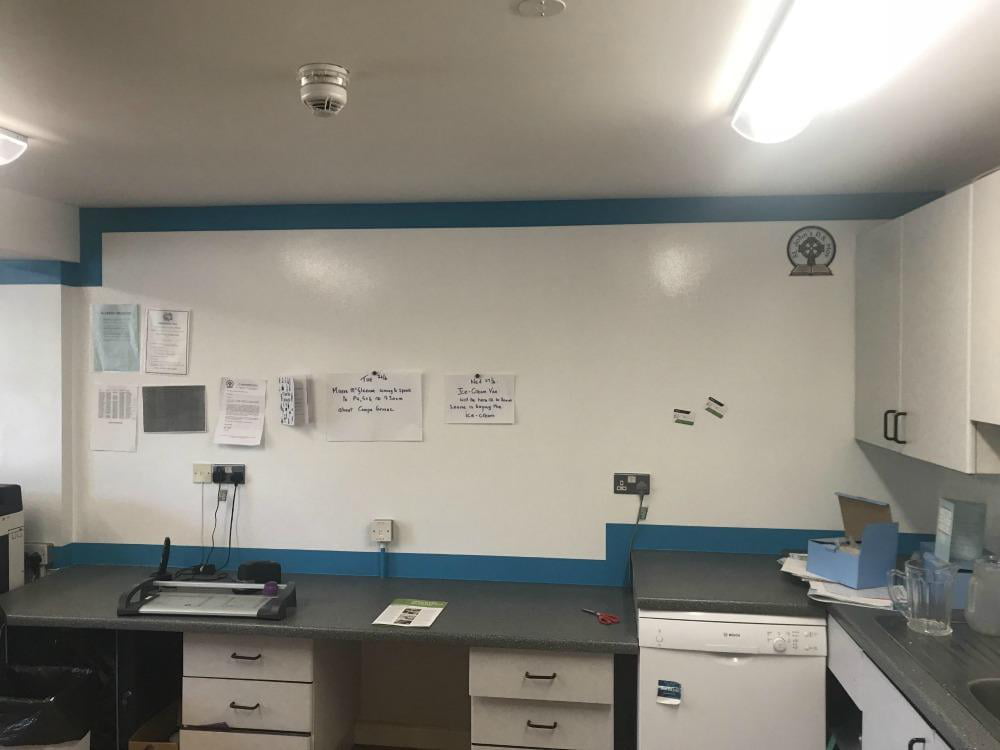
The staff at St. John’s Primary School wanted a way to better organize their days, so they decided to create a magnetic whiteboard surface in their staff room.
To do this, they combined Smart Magnetic Paint and Smart Whiteboard Paint.
Now they can organise and manage their day most efficiently.
Replace thumbtacks with magnets
Sick of finding all of your notices on the floor instead of where they should be? Most staff room notice boards are filled with thumbtacks that have a hard time keeping your documents in place. So why not try a magnetic whiteboard surface instead?
You can stick four sheets of A4-size paper with a single neodymium magnet on a wall treated with the Smart magnetic paint by Smarter Surfaces. The super magnetic paint with a 60% magnetite content offers even better magnetic pull. With a large enough magnet, you can mount a TV on a wall treated with the magnetic plaster by Smarter Surfaces, thanks to its 75% magnetite content.
Now, maybe you have a quick update you need to share with your colleagues. Don’t waste time typing and printing it out. Instead, simply write your update onto the wall and wipe it off when it’s no longer relevant.
Magnetic whiteboard walls give you the freedom to easily and effortlessly display your notices. That’s how it should be.
Important Information Where You Can See It
In most schools, there will be students who suffer from medical conditions or allergies.
To ensure the proper health and safety of these students, all staff must be aware of who these students are and what they are dealing with.
With a magnetic whiteboard surface, you can stick up pictures of students in your staff room and write out important details. These can be what allergy or condition students may have what to do and who to call in case an emergency arises.
Don’t forget the health and safety of your staff members.
All of our magnetic whiteboard products are low VOC and won’t trap dust like noticeboards keeping your staff room air as clean as possible.
Explore more possibilities with Smarter Surfaces
There’s a lot of potential trapped inside your staffroom walls. Tap into it by adopting smart communication, and collaboration mechanisms like the magnetic whiteboard. Have an expert look at your walls, and learn what the possibilities are.
Book a free consultation video call with the product advisors at Smarter Surfaces
Share a photo or a video of your wall and we will share ideas to help you make the most out of it
Get personalized guidance from experts
Our educators’ programme is specially designed to help schools adopt smarter collaborative apparatuses with ease. As a member of the programme, you will enjoy free shipping, personalized customer support, and credit payment facilities.
by administrator | Oct 25, 2018 | Blog

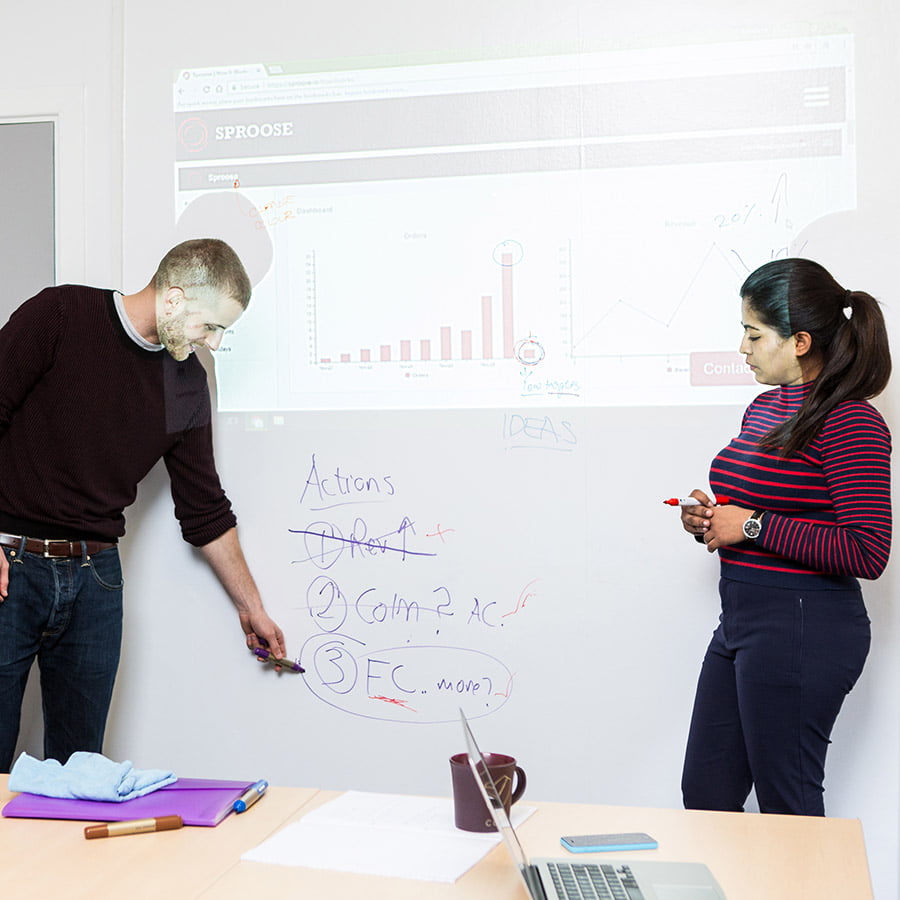
As the name suggests a projector whiteboard wall combines two functionalities – a whiteboard, and a projection wall. That means you can use a projector whiteboard wall for writing with dry-erase markers and projecting images and videos with a projector. The fun part is, you can do both simultaneously.
A writable wall in any office setting has a deep positive effect on the people who work there. It invites more collaboration, encourages creativity, and over time becomes a hub of recreational activities that boost morale.
The moment you add the projection-screen functionality to a writable wall, its operational value just jumps up a few notches.
Imagine a strategy meeting that involves discussion over charts, spreadsheets, and new proposals. How cool is it if you could project the charts, and spreadsheets on a wall while writing your comments and new ideas on the same wall with a dry-erase marker?
Having a projector whiteboard wall in an office is a terrific idea and the best part is you can install it yourself. In this post, we’ll discuss the key benefits of a projector whiteboard wall and explain how you can install it in easy steps.
Key benefits of having a projector whiteboard wall in an office
- It’s a wall so it does not take up extra space but rather creates it
Mobile projector screens require storage space, you have to move stuff to install it for use, and you need to carefully maintain it when it’s not in use. A projector whiteboard wall is just a wall. You don’t need to fold it, wash it, or roll it up and store it anywhere.
- Dual functionality
You can write on a projector whiteboard wall, project images on it, and do both simultaneously. You can project your website on the wall and draw on it to mark any issues you find. It does not get any better than that, or does it?
- Magnetic Projector Whiteboard Wall
So, it does get better. With the magnetic projection whiteboard wallpaper designed and manufactured by Smarter Surfaces, you can have three functionalities on one wall. Project on it, write on it, stick notes on it with a magnet, and do all of them at the same time.
- Ease up communication between teams
The communication gap between different teams results in a lot of lost time at workplaces. Let’s say the marketing team wants a small change made to the marketing website. They have to go through trial and error to properly convey their requirements to the front-end developer. The mail trail gets longer and everyone loses patience.
A projector whiteboard wall could have made it much easier. Projet the existing site, and mark the area where the change is needed with a marker. If you need a specific image or icon installed at that place, print it out and stick it with a magnet. Problem solved, and communication gap bridged.
- Your company gets a new outlook
Clients visit your office to get a brief on the progress you’ve made working on a piece of software you’ve been commissioned to design. With a projector whiteboard wall, you can project the prototype and draw the upcoming features on it. It paints a clear picture in the minds of your clients, and they know that their project is in the right hands.
How to create a projector whiteboard wall?
There are two ways of creating a projector whiteboard wall. You can paint your wall with matt whiteboard paint or apply whiteboard projector wallpaper to it.
The matt whiteboard paint by Smarter Surfaces has a gloss level of around 51 Gloss Units at a 60° viewing angle whereas the whiteboard projector wallpaper has a slightly lower gloss level of 41 GU which is comparatively better for projection. However, if your wall has fixtures on it or if you’re in a rented office and applying wallpaper is in violation of your contract with the building owner, the matt projector whiteboard paint is more suitable for you.
Nevertheless, we’ll discuss the installation steps for both products.
How to apply the matt whiteboard paint
- First, measure your wall and make sure you get the right amount of paint to cover it properly. After that, tape off any wall-mounted fixtures like switches.
- Ensure there are no cracks, holes, or other defects in the wall. If there are, cure them with a decorator’s filler and wait for the filler to dry.
- Once you have a smooth surface, apply a white water-based primer. 2 coats of primer should be enough. Apply another coat if any traces of the paint underneath are visible.
- Once the primer is absolutely dry (it usually takes up to 12 hours), your wall is ready for a coat of matt whiteboard paint.
- The matt whiteboard paint comes in two parts – part A and part B. Mix all of part A with part B and stir it well for no less than five minutes. Once mixed, start applying the paint to your wall in small sections. Use the roller sleeve provided in the application kit (make sure you use a fresh roller sleeve for the whiteboard paint).
- Refer to the step-by-step application guide during installation to avoid any issues.
- It will take four days for the paint to cure. After that, you’ll have a low-sheen projector whiteboard wall.
How to install the whiteboard projection wallpaper
- First, clean the wall with a damp cloth to ensure there is no dust. You can sand it lightly to get rid of any inconsistencies. Scrap off loose paint or old wallpaper if any.
- Then, stir the adhesive till you achieve a smooth consistency. You can add up to 10% water if needed.
- Apply two coats of adhesive on the wall waiting a bit for the first coat to dry. Use 1kg of adhesive per square metre of surface area for each coat. Once the second coat is applied, start putting up the wallpaper.
- The whiteboard projection wallpaper installation guide has step-by-step instructions and expert tips to help you apply the wallpaper correctly. Follow the guide closely to manage edges and overlaps.
- Once the wallpaper is installed, check for air bubbles and lumped adhesive. Push those towards the edges to get a smooth finish. Wipe off any adhesive residue on the edges with a damp cloth.
You can follow the same steps to apply the magnetic projector whiteboard wallpaper. Here’s a DIY video tutorial to make things easier for you.
Our expert advisors are available to answer any questions and offer advice, get in touch for free expert support. Whether it’s choosing the right product for your project or installation advice we are here to help. Planning a future project? Book a free video or phone call here.
by administrator | Oct 24, 2018 | Blog

Do you work in a digital marketing agency? You’re not doing door-to-door marketing anymore, so why are you still limiting yourself to pen and paper?
Consider adding functional surfaces to your workspace to transform the way you plan, develop content and analyse your marketing strategies.
Keep reading below to see why magnetic whiteboard walls deserve to be in digital marketing agencies.
Digital Marketing Agencies Can Plan Social Media
You know that social media plays a huge factor in digital marketing, but are you planning your posts as efficiently as you could be?
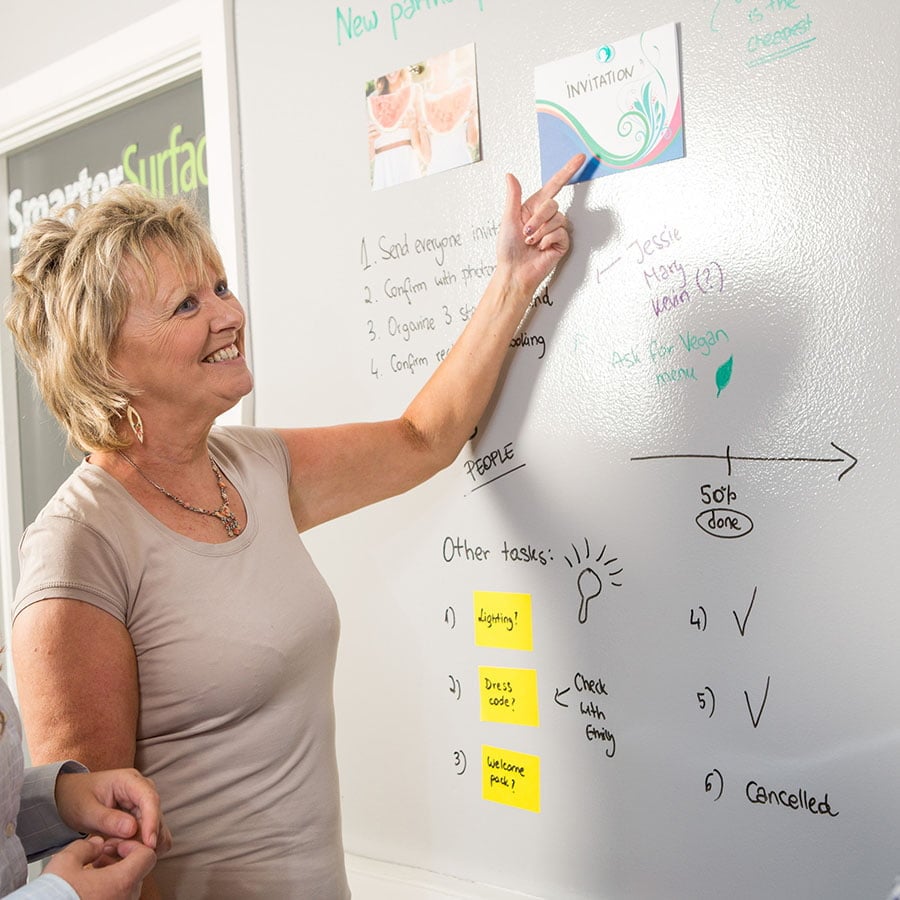
Magnetic whiteboard walls are a great tool for social media planning as you can easily write up caption ideas or stick up posts.
Digital marketing agency Made To Engage wanted to optimize their social media planning, and so decided to create their own magnetic whiteboard wall. To achieve this they used Smart Magnetic Wallcovering and Smart Whiteboard Paint.
Now they can take their social media planning to the next level.
When developing websites, it can be frustrating only being able to work on one page at a time. With a magnetic whiteboard wall, you don’t have to.
Just stick up images of each website page onto your wall and write down all of the changes you want to make. Then take a picture of your wall and use this for a reference when you get to work.
You won’t be wasting time clicking through website pages ever again.
Analyse Marketing Strategies
When you are trying out new marketing strategies, you need to analyse what is and isn’t working. Keeping track of followers and views can help you monitor how well your new strategies are being received.
Why not use your magnetic whiteboard wall to keep track of how many social media followers you have or the monthly views of your website?
This way you can easily write up and update the figures every week for the whole office to see.
Being able to visualise all of your data on a larger scale can help you with making decisions on what marketing strategies to use in the future. Check out Smart 2-in-1 Wallcovering: Magnetic and Dry Erase For a magnetic whiteboard wall in one product and application.
Have you any questions regarding our products? Call us on the relevant number below:
US: 1800 932 1609 UK: 0203 5145395
IE: 01 4126200 CA: 1800 948 9438
by administrator | Oct 22, 2018 | Blog

So you want to install a whiteboard wall in your office but don’t want it to be white? We have the perfect solution for you.
You can use clear dry-erase paint to convert any smooth surface including walls, and desktops into a writable surface without altering the original colour. It lets you create collaborative hubs inside your office without compromising the aesthetic appeal of the space. In this post, we’ll discuss the steps you can take to create a dry-erase surface in any colour of your choice.
How does clear dry erase paint work?
Clear dry-erase paint is created by infusing specialist resin with nano-particles. The nanoparticles create a smooth, non-porous surface that the ink from a dry-erase marker can sit on.
The nanoparticles also give the surface a hydrophobic character. This is crucial as the dry-erase marker ink is formed by suspending pigment particles in water. The ink droplets sit on the hydrophobic surface without bonding with the paint.
The paint also allows controlled adhesion between the ink and the paint ensuring that the ink is easy to remove without leaving a stain.
The transparency of the nanoengineered resin in the clear dry-erase paint ensures lets you retain the colour of a wall while turning it into a whiteboard.
The steps to creating a writable wall in any colour
With the right products and detailed guidelines, any nonprofessional can turn a regular wall into a clear writable surface. The steps are pretty simple.
1. Buying the right product
It’s very important to have the right amount of paint for your wall. Too much or too little paint can jeopardize the performance of your whiteboard wall. So first, measure the height and the width of the wall you want to cover with clear dry-erase paint. From that, you can get the area of the wall. Smarter Surfaces has clear whiteboard paint kits for 2 m², 6 m², and 18 m² walls. You can choose the right size for your purpose.
If you have a freshly painted concrete wall, the clear dry-erase paint can go directly on top of it. However, if you wish to turn a wooden wall into a whiteboard, you’ll need to apply a couple of coats of clear primer before applying the clear whiteboard paint. You can add or remove the primer from your cart while purchasing the paint based on your needs. If you’re unsure if your wall needs a primer, contact our product experts. They’ll help you out.
2. Preparing the wall
A smooth, freshly painted wall doesn’t need a lot of preparation. Sand it ever so lightly and tape off the outer edges of the application area as well as any wall-mounted fixture that you might want to paint around.
In case In case your wall is not smooth, has holes and inconsistencies, you’ll have a couple of extra steps.
- Fill the holes: Use a regular decorator’s filler to fill any holes in the wall. Sand the area off to make it smooth.
- Colour the wall: Apply the coloured paint of your choice and wait for it to dry completely.
3. Prepare to paint
Fix a roller using the roller sleeve and roller handle provided with the kit. It’s important to use a fresh roller for the job.
The Smarter Surfaces Clear Whiteboard Paint has two parts: Part A and Part B.
Once your wall is ready for application, pour the entirety of Part A into Part B and stir it for at least 5 minutes with the stick provided in the application kit until you achieve a perfect blend.
You should prepare the roller before mixing the paint as you must apply the paint on the wall within an hour of mixing part A with part B.
4. Applying the paint
Apply the clear whiteboard paint in sections and check each section as you go to ensure no missed spots
- Pour the paint mix into a painting tray and soak the roller in it
- Make sure the entire roller is covered in paint but it’s not dripping
- Apply the paint with vertical strokes of the roller starting from the left side.
- Roll it up and down 10 times with even pressure.
- Check for missed patches, inconsistencies, or debris from the roller from multiple angles.
The paint becomes touch-dry within 4-5 hours of application. It takes 4 days for the nanoparticles to make the surface performance-ready. Smarters Surfaces’ clear dry-erase paint comes with a 10-year performance guarantee.
How to turn a wooden wall into a clear whiteboard
Being porous, wood soaks in the paint. Before applying the clear whiteboard paint, you need to prime the wooden surface using a clear primer. It closes the pores and gives your whiteboard paint a suitable surface to sit on.
Creating a magnetic whiteboard in any colour
You can follow the detailed DYI guidelines to create a magnetic wall. Once you have a magnetic wall, you can paint it with any colour of your choice. A high-sheen bright colour is more suitable for use as a clear whiteboard. Once the paint dries up, you can apply the clear whiteboard paint. You will have a high-performance magnetic whiteboard wall in 4 days.
Product advisors at Smarter Surfaces are always ready to help you through every step of the purchasing and the application process. Book a free video consultation now.
by administrator | Sep 12, 2018 | Blog

What we call magnetic whiteboard paint is not a single product but rather a combination of multiple products and specific application processes that lead to a magnetic whiteboard wall. The magic is in the products and the processes are simple.
In this post, we’ll walk you through the benefits of magnetic whiteboard paint for offices – the products you can use, the performance you can expect, and the measures you can take to give it a long life.
What is magnetic paint and how does it work?
Magnetic paint is paint infused with magnetite – a ferrimagnetic mineral ore. Any surface painted with it gets ferrimagnetic properties. That means it develops a magnetic pull and attracts magnets.
You can use magnetic paint directly on any smooth, non-porous surface. 4-5 coats of magnetic paint should enable any surface to hold 4 to 5 sheets of A4-size paper with one neodymium magnet.
In an office space, a magnetic wall can be used to stick memos, notes, photographs, charts, and even heavier objects depending on the treatment of the wall and the size of the magnets.
Different magnetic whiteboard paints for offices
Smarter Surfaces lets you choose among two kinds of magnetic paints, magnetic plaster, and magnetic wallpapers. In the sections that follow, we’ll walk you through the key features of these products and how they can add a collaborative flair to your workspace.
Magnetic Paint
The magnetic paint by Smarter Surfaces is a dark grey paint with a 55% magnetite content. You can apply it on walls, plaster, concrete, wood, metal, doors or any smooth surface. You need a minimum of 4 coats and a maximum of 7 coats of paint to create sufficient magnetic pull for holding 4 sheets of A4-size paper with one neodymium magnet.
The paint has very low VOC (<12g/l), no PFOA & PFOS, and it is solvent-free. It is an environmentally friendly product that exceeds all regional quality and safety standards.Smarter Surfaces’ magnetic paint is priced at $114 for 2.28 kg. It is enough to cover a 3m² area. A bigger tin containing 5.56 kg of paint costs $306 and it covers 9m² of area.
Super Magnetic Paint
Super magnetic paint is a superior version of magnetic paint with a higher magnetite content. It has more than 60% magnetite and offers better magnetic pull than regular magnetic paint. It is a great fit for digital wall prints.
Just like all Smarter Surfaces products, super magnetic paint has very low VOC and it is free of PFOA, PFOS, and solvents.
2500 ml of Super Magnetic paint will cost you $210. It covers an area of 6m²
Magnetic Plaster>
Magnetic plaster is the strongest solution for building magnetic surfaces. It is a pre-mixed plaster with a 75% magnetite content. You can directly apply it to a wall like a regular plaster. You can paint over it or use it as a magnetic wall 24 hours after application. You can get 10 kg of magnetic plaster which covers 6m² for $269.
Magnetic plaster allows your regular wall to hold eight sheets of A4-size paper with a single neodymium magnet. That means with larger magnets you can mount much heavier things on the magnetic plaster. Our customers have mounted television sets and canvases on magnetic plaster using large and powerful magnets. The surface area of the magnet is the key to expanding the functionality of the wall.
Creating a magnetic whiteboard
As we mentioned earlier, magnetic whiteboard paint is a combination of products applied in a specific sequence. Here is how you can create a magnetic whiteboard wall for your office.
As we’ve already discussed, you can create a magnetic wall using magnetic paint, super magnetic paint, or magnetic plaster. Regardless of which one of these you choose, you must start with a smooth, consistent, non-porous wall.
So, prepare your surface by filling the holes, sanding the lumps, and priming it if needed. Once the surface is ready, you can apply 4-7 coats of paint or 2 coats of plaster to it. You must wait for one coat to dry before applying the next one. The wait time is 2-3 hours for magnetic paint and at least 6 hours for the plaster.
Once all the coats are done and dry. You can choose either of two paths – a white whiteboard paint or a clear whiteboard paint.
If you want to apply white whiteboard paint, you’ll need to conceal the dark grey magnetic paint using a water-based white primer. You may need 2-4 coats of primer for the job. After the primer dries up with no sign of moisture, you can apply the white whiteboard paint.
If you decide to have a coloured magnetic whiteboard wall, you can put the coloured paint on the magnetic wall and let it dry for at least 12 hours. Once the paint is dry, you can apply a coat of clear whiteboard paint.
4 days after the application of paint, your magnetic whiteboard wall will be ready to use.
You can get the magnetic whiteboard paint white kit to cover 6m² for $558 and the magnetic whiteboard clear kit for the same area for $526.
Magnetic whiteboard wallpaper
The alternative to magnetic whiteboard paint for offices is magnetic whiteboard wallpaper. The magnetic whiteboard wallpaper can be applied on any wall using a vinyl over vinyl adhesive. It is easy to apply and becomes ready to use as soon as the adhesive dries up.
Smarter Surfaces has designed a three-in-one wallpaper that has magnetic qualities, and dry-erase properties and works as a projection screen. The projection screen magnetic whiteboard wallpaper is the ultimate magnetic whiteboard solution for offices. It fits perfectly in meeting rooms where strategic discussions can take a whole new dimension through its use.
Magnetic wallpapers start from $350.
All Smarter Surfaces products are very adaptable in different situations. For instance, while the clear whiteboard paint is not suitable for direct application on a wooden wall, you can easily solve that by applying a coat of clear primer first. Nevertheless, there is always one best product for every situation and our product advisors can help you find that. Book a free video consultation now.